To take apart a faucet, turn off the water, remove the handle, and disassemble the internal parts based on the faucet type (compression, cartridge, ball, or ceramic disc). Most faucet repairs start with this simple process.

Quick Answer
Step-by-Step Disassembly
Identify Your Faucet Type
Compression Faucet
Ceramic Disc Faucet
Ball Faucet
Cartridge Faucet
FAQs
If your faucet is leaking, dripping, or hard to turn, you’ll need to take it apart to repair it. The process is straightforward once you know your faucet type.
Quick Answer
Turn off the water, remove the handle by loosening the hidden screw, then take apart the internal components. Replace worn washers, seals, or cartridges before reassembling.
How to Take Apart a Faucet (Basic Steps)
- Turn off the water supply. Shut off the valves under the sink.
- Plug the drain. Prevent small parts from falling in.
- Remove the handle. Pry off the decorative cap and unscrew the handle.
- Disassemble internal parts. Follow the faucet type instructions below.
- Lay out parts in order. This makes reassembly easier.


Turn off the water before disassembling a faucet.
Identify Your Faucet Type
Before disassembling further, identify the faucet style:
- Compression: Two handles (hot and cold)
- Ball: Single handle with rotating ball
- Cartridge: Smooth single or double handle operation
- Ceramic disc: High-end, very smooth operation
Each type uses different internal parts.
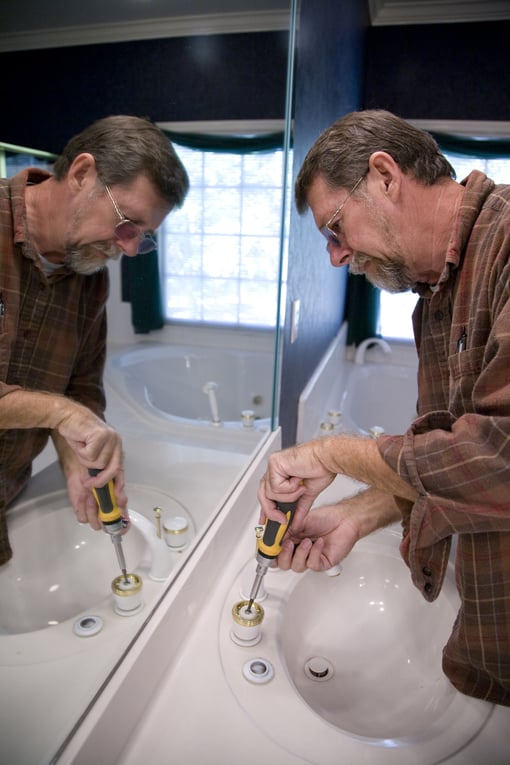
Remove trim and handle to access internal faucet parts.
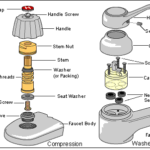
Compression Faucet
Compression faucets use rubber washers that wear out over time.
- Unscrew the bonnet using pliers
- Remove the valve stem (reverse threads)
- Replace washers and O-rings
This is the most common cause of dripping in older faucets.
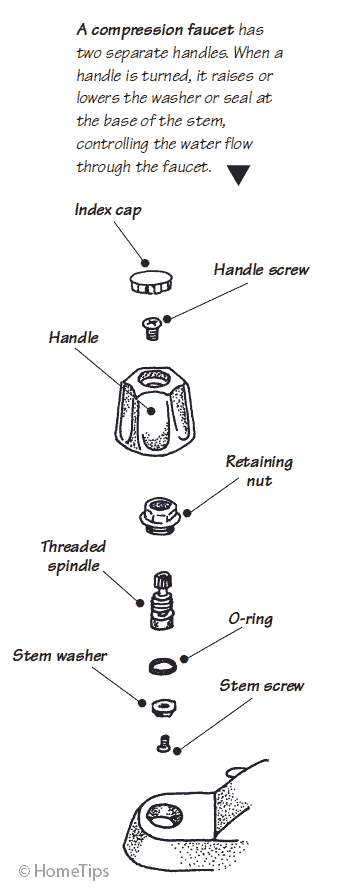
Compression faucet parts.
Ceramic Disc Faucet
These faucets use two ceramic discs to control water flow.
- Remove the handle and access the cartridge housing
- Clean sediment from seals
- Replace seals if leaking
Tip: Do not overtighten—this can damage the ceramic discs.

Ceramic disc faucet design.
Ball Faucet
Ball faucets use a rotating ball to control water flow.
- Remove handle and cap
- Lift out the ball assembly
- Replace seats, springs, and O-rings
Leaks are usually caused by worn rubber components.
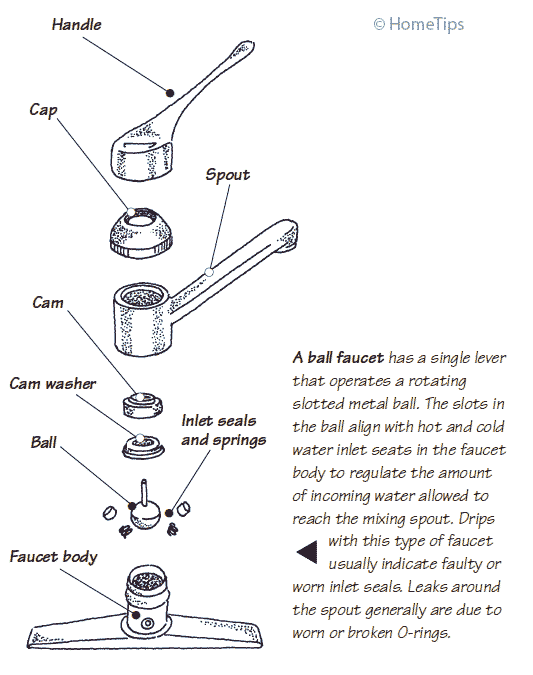
Ball-style faucet parts.
Cartridge Faucet
Cartridge faucets use a replaceable insert to control flow.
- Remove handle and retaining clip
- Pull out the cartridge
- Replace cartridge or seals
If the faucet drips, replacing the cartridge is often the easiest fix.
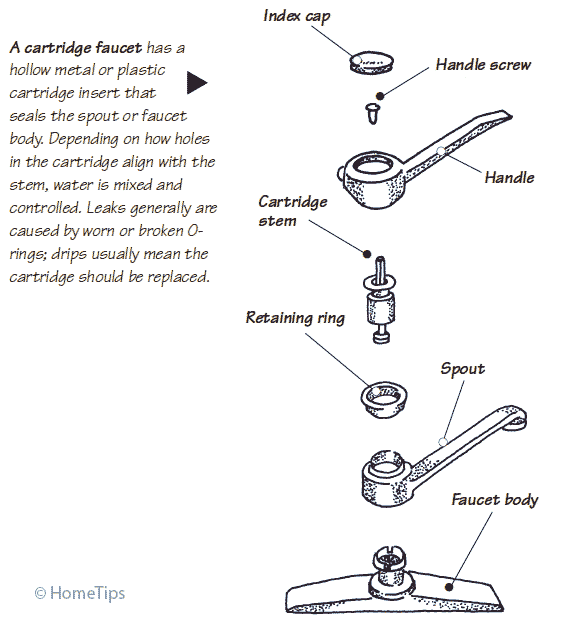
Cartridge faucet components.
FAQs
Is it hard to take apart a faucet?
No. Most faucets can be disassembled with basic tools in under 30 minutes.
Do I need special tools?
Usually just a screwdriver, wrench, and Allen key.
Should I replace or repair my faucet?
If the faucet is old or heavily corroded, replacement may be more cost-effective.
NEXT SEE: