Use these light switch wiring diagrams to wire or troubleshoot standard, 3-way, 4-way, and dimmer switches safely and correctly.

Quick Answer
Which Diagram Do You Need?
How to Read a Wiring Diagram
Standard Switch Wiring
3-Way Switch Wiring
4-Way Switch Wiring
Dimmer Switch Wiring
Common Wiring Mistakes
Troubleshooting Switch Wiring
FAQs
Light switch wiring diagrams help you understand how power flows through switches and lighting circuits. Whether you’re replacing a switch, adding a new light, or troubleshooting a problem, using the correct diagram is essential for safe wiring.
The diagrams below show the most common residential switch configurations, including standard single-pole switches, 3-way switches, 4-way switches, and dimmers.
Always turn off power at the circuit breaker and verify wires are not energized before working on switches or electrical wiring.
Quick Answer
Light switch wiring diagrams show how hot, neutral, traveler, and ground wires connect to switches and fixtures. A standard single-pole switch controls a light from one location, a 3-way setup controls it from two locations, and a 4-way setup allows control from three or more locations.
Bottom line: The correct diagram depends on how many switches control the light and where power enters the circuit.

Don’s Advice
One of the biggest mistakes homeowners make is assuming all switch wiring works the same way. In reality, switch layouts can vary dramatically depending on where power enters the circuit and how many switches control the light.
That’s why matching your wiring to the correct diagram is so important before disconnecting any wires.
Which Light Switch Wiring Diagram Do You Need?
Choose the diagram based on how many switches control the light.
- One switch controls one light: Use a standard single-pole diagram
- Two switches control one light: Use a 3-way switch diagram
- Three or more switches control one light: Use a 4-way switch setup
- You want adjustable lighting: Use a dimmer switch diagram
Before starting, confirm:
- How many switches control the light
- Where power enters the circuit
- Whether a neutral wire is present
- Whether the home uses older wiring methods
How to Read a Light Switch Wiring Diagram
Most residential wiring diagrams use standard color conventions.
- Black wires: Hot wires carrying power
- White wires: Neutral wires
- Red wires: Traveler wires or secondary hot wires
- Green or bare copper: Ground wires
Follow the hot wire path to see how power flows through the switch and to the light fixture.
See also: What the Red Wire Means on a Light Switch
Don’s Advice
Older homes don’t always follow modern wire color conventions. Previous repairs, remodels, or reused cables may leave wires that don’t match standard diagrams.
Never rely on wire color alone—always identify wires based on how they are connected and tested.
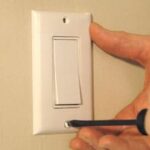
Standard Light Switch Wiring Diagram

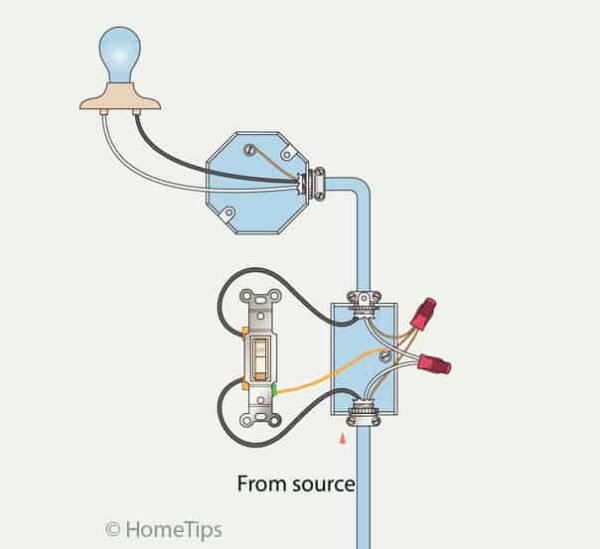
A standard (single-pole) switch controls a light from one location by interrupting the hot wire.
This is the most common switch configuration used in homes.
Typical uses include:
- Bedrooms
- Bathrooms
- Closets
- Utility rooms
- Garages
See full guide: Standard Light Switch Wiring
Troubleshooting this setup? See Light Switch Not Working
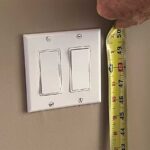
3-Way Switch Wiring Diagram

A 3-way switch setup allows two switches to control the same light from different locations.
This arrangement uses traveler wires that carry power between the switches.
Common locations include:
- Hallways
- Stairways
- Large rooms with multiple entrances
- Garages with two entry points
3-way wiring is often confusing because there are several valid configurations depending on where power and the light fixture are located.
See full guide: 3-Way Switch Wiring
Don’s Advice
Many 3-way switch problems happen after a homeowner replaces one switch and accidentally moves the common wire to a traveler terminal.
When that happens, the switches may work intermittently, backwards, or only in certain positions.
4-Way Switch Wiring Diagram
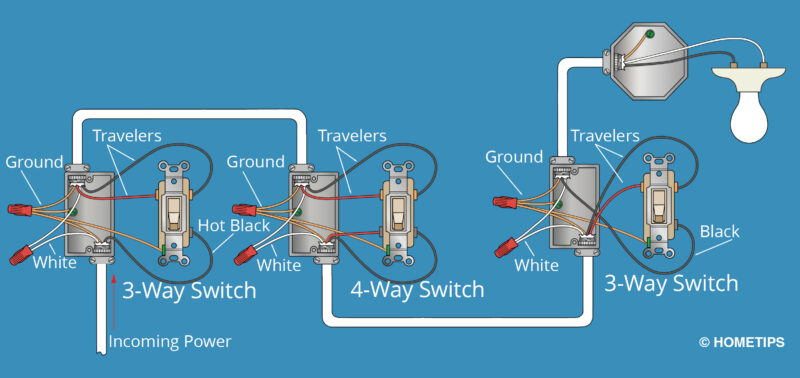
A 4-way switch setup is used when three or more switches control the same light.
The 4-way switch sits between two 3-way switches and reroutes the traveler wires depending on switch position.
These systems are commonly used in:
- Long hallways
- Multi-level stairways
- Large open homes
- Areas with multiple entrances
See full guide: 4-Way Switch Wiring
Troubleshooting this setup? See Light Switch Not Working
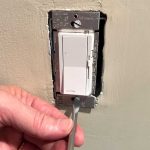
Dimmer Switch Wiring Diagram
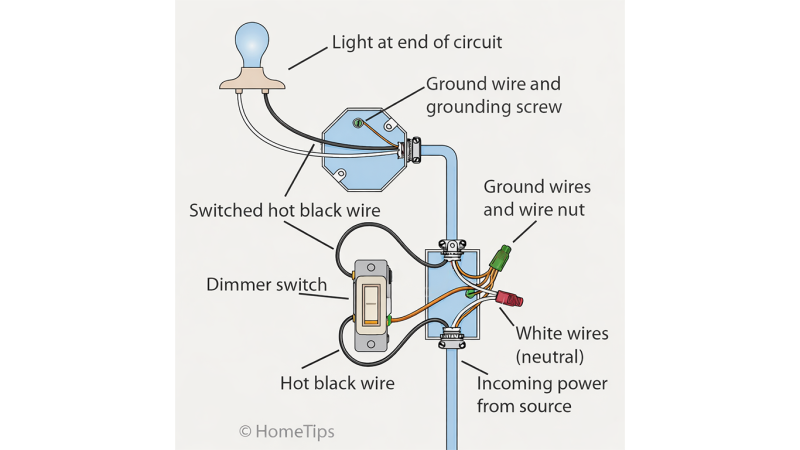
A dimmer switch replaces a standard switch and allows adjustable light levels.
Most dimmers are wired like standard single-pole switches, though some support 3-way configurations.
Modern dimmers may also require:
- Neutral wires
- Compatible LED bulbs
- Specific load ratings
Improper bulb compatibility is one of the most common causes of dimmer problems.
See full guide: Install a Dimmer Switch
Troubleshooting this setup? See Light Switch Not Working
Common Light Switch Wiring Mistakes
Many switch problems are caused by small wiring mistakes.
- Connecting wires to the wrong terminals
- Confusing neutral and hot wires
- Mixing up traveler and common wires
- Using backstab connections instead of screw terminals
- Failing to tighten wire connections securely
- Working on live circuits
Loose switch connections are a very common cause of flickering lights and intermittent operation.
Troubleshooting Light Switch Wiring
If a switch isn’t working correctly, check for:
- Loose terminal screws
- Incorrect traveler wiring
- Backstabbed wires
- Faulty switches
- Loose wire nuts
- Damaged insulation
See Light Switch Not Working for troubleshooting guidance.
For more detailed repairs, see Complete Light Switch Wiring & Repair Guide.
FAQs
What is the difference between a single-pole and 3-way switch?
A single-pole switch controls a light from one location, while a 3-way setup allows two switches to control the same light.
What does the red wire do on a light switch?
The red wire is commonly used as a traveler wire in 3-way switches or as a secondary hot wire.
Why does my 3-way switch work backwards?
This usually indicates the common wire was connected to the wrong terminal during installation.
Can I replace a standard switch with a dimmer?
Usually yes, but the dimmer must match the circuit type and bulb compatibility.
Should I use backstab connections?
No. Screw-terminal connections are generally more reliable and durable over time.