If your toilet still runs after replacing the flapper, the problem is usually a faulty fill valve, improper water level, or a damaged flush valve seat. These issues are still inexpensive to fix and typically don’t require replacing the toilet.

If you’ve already replaced the flapper and adjusted the chain but your toilet continues to run, the issue is likely deeper inside the tank. In these cases, the toilet may appear to work normally but continues refilling periodically or produces a constant trickling sound.
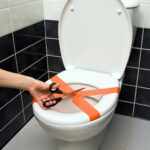
If you haven’t replaced the flapper yet, start here: How to Fix a Running Toilet.
In This Article:
Quick Answer
Signs It’s Not the Flapper
What to Check Next
When to Replace Parts
When to Call a Plumber
Quick Answer
If a toilet keeps running after replacing the flapper, the most likely causes are a faulty fill valve, a damaged flush valve seat, or tank water rising into the overflow tube. Check and adjust the water level first, then inspect the fill valve and flush valve.
Bottom Line: If a new flapper didn’t solve the problem, the leak is coming from another tank component—usually the fill valve, overflow setup, or flush valve seat.
Signs the Problem Is Not the Flapper
- The tank refills periodically without being flushed
- Water flows into the overflow tube
- The fill valve cycles on and off
- The tank water level slowly drops
- The toilet runs randomly throughout the day
These symptoms usually point to a fill valve or flush valve problem rather than the flapper.

Step-by-Step: What to Check Next
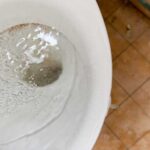
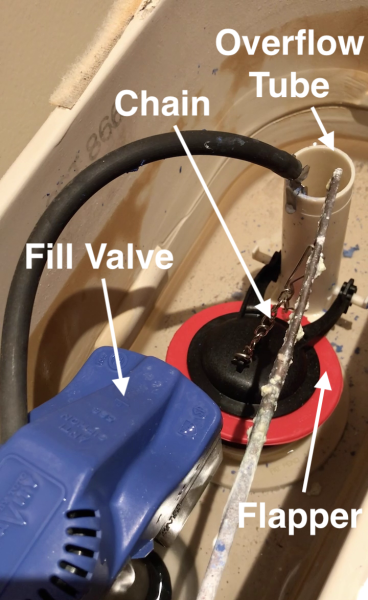
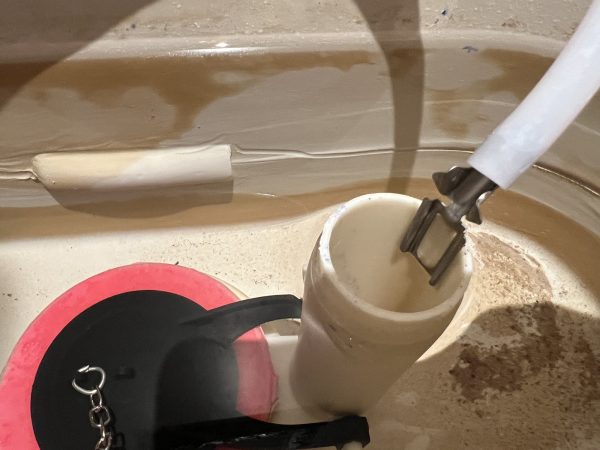
1. Check Whether Water Is Entering the Overflow Tube
Remove the tank lid and watch the water level after the toilet refills.
Water should stop about 1/2 inch below the top of the overflow tube.
If water spills into the tube, the fill valve is allowing too much water into the tank.
Fix: Adjust the float downward until the water stops below the overflow tube.
See: Toilet Bowl Water Level Too High or Too Low: How to Fix It
2. Test the Fill Valve Shutoff
Sometimes the fill valve cannot shut off completely.
Watch the fill valve after the tank finishes refilling.
Signs of failure include:
- a faint hissing sound
- water trickling from the valve
- the valve turning on and off repeatedly
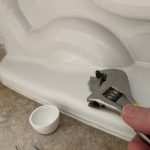
Fix: Replace the fill valve. Modern replacement valves are inexpensive and widely compatible.
3. Inspect the Flush Valve Seat
Even with a new flapper, the toilet may still leak if the flush valve seat is rough or damaged.
Lift the flapper and inspect the circular rim where it seals.
Look for:
- mineral buildup
- debris
- rough or pitted surfaces
Fix: Clean the surface with a cloth or nylon pad. If the seat is damaged, you may need to replace the flush valve.
4. Check the Refill Tube Position
The refill tube should direct water into the overflow tube but must not extend below the water level inside the tube.
If it does, it can create a siphon that slowly drains the tank.
Fix: Clip the refill tube so it sits just above the overflow opening.
5. Look for Internal Tank Leaks
In rare cases, the tank may leak internally.
Signs include:
- constant refill cycling
- unexplained water loss
- dampness around tank bolts or seals
If multiple components are deteriorated, replacing the tank hardware or flush valve assembly may be necessary.
When Replacement Is the Better Option
If several components inside the tank are worn, it may be easier to replace all internal parts at once.
Complete toilet rebuild kits typically include:
- fill valve
- flapper
- flush valve
- gaskets and hardware
This can be faster and more reliable than replacing parts individually.
When to Call a Plumber
- The problem continues after replacing multiple parts
- The flush valve seat is damaged
- You suspect hidden leaks or structural issues
If needed, see how to hire the right plumber.